Website Builder and How to Use It
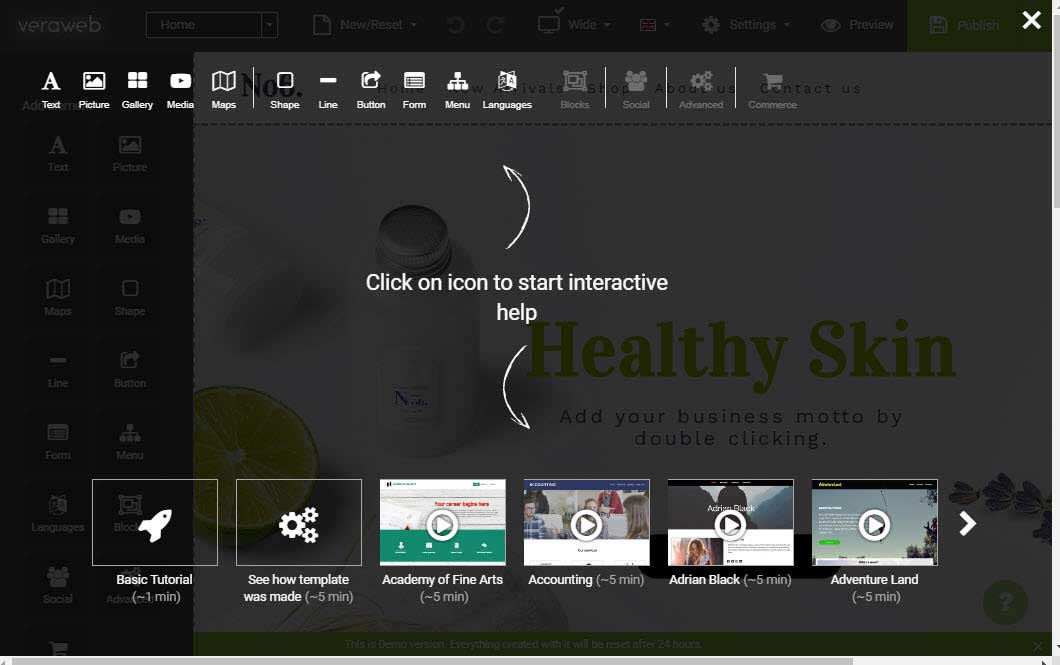
ebsite Builder includes short built-in interactive video tutorials for each option and tool.
Have a look at the tutorials by clicking the “?” icon at top corner ![]()
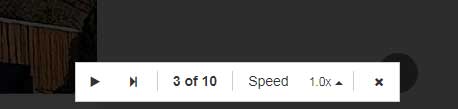
NOTE: You can control the playback using tools at the bottom of the page:
How to Create a Website
- In order to start working with Website Builder, log into your User Area
In User Area, go to Websites >> My Websites >> On your website Click on “Active” >> Edit Website:

- NOTE: As the URL for Website Builder is the same for all domains and subdomains, do not open several windows of Website Builder in the same browser as it will interfere with your settings and the changes you have made may not be saved properly. Because of this, if you open two or more windows with Website Builder within the same browser and try to publish your website, you may see the following warning:

Choosing a Template
- All templates are divided into different topics and can be found on the left-side menu:

Simply hover over it and you will see the following options:
- Select – allows you to choose the template you wish to use to start creating your website
- Preview – redirects you to a preview version of your website with the selected template assigned. Here, you can see the look of your website with the selected template, before you make your website live
- Guide – redirects you to a video guide to give handy tips on how to use different options to create your site in the template. You can pause the video at any time or fast forward and even slow down the speed so you don’t miss anything! While this tool ‘creates’ the template in real time, you can change speed and stop this process at any moment and continue editing the website from the point where that tool stopped.

After you select a template, you will be redirected to the builder dashboard with the template applied. It will appear similar to the following:

General Options
At the left and top of the page you can see different menus that allow you to edit the template to customize your site

The Publish menu has several options. You can save the site and publish it to the Internet, save a draft of your site without publishing it, or backup/restore the site.
If you’d like to create a backup of your website on your local device, you can choose the backup/restore option and download the backup. The backup file will be downloaded in the special Website Builder file format.
Similar steps should be taken to restore the website if necessary. Restore option allows you to go back to the previous saved version of your website.
The Preview option will redirect you to a view where you will be able to check how the website will look like on desktop and mobile devices at different screen resolutions:
The Undo/Redo buttons can be used to undo the *most recent changes or restore them (not everything).
The New/Reset menu allows you to change the template or reset the current template to the original settings. Note: when reset template you will lose everything.
The next menu option allows creating special variants of the website for the Wide, Desktop, Tablet, and Phone versions. To start working on the particular variant, you need to choose from the top menu and click to enable it:

Keep in mind that various devices have different screen resolutions. If you design the website for ‘Wide’ view, for example, it will display differently under the ‘Desktop’ view, as the ‘Desktop’ view has a smaller resolution.
You can use view settings to optimize design for different devices.
There is also a menu option for the beta version of Auto Layout. It dynamically calculates the size and position of all the views in your view hierarchy, based on constraints placed on those views and makes your website responsive on different devices automatically. In case you want to work with it, just click on it to apply it to your template.
Website Editor
The menu to the top left helps you navigate through the pages of the website, and top right you can configure general settings and choose the language of the interface:

Keep in mind that various devices have different screen resolutions. If you design the website for ‘Wide’ view, for example, it will display differently under the ‘Desktop’ view, as the ‘Desktop’ view has a smaller resolution.
You can use view settings to optimize design for different devices.
There is also a menu option for the beta version of Auto Layout. It dynamically calculates the size and position of all the views in your view hierarchy, based on constraints placed on those views and makes your website responsive on different devices automatically. In case you want to work with it, just click on it to apply it to your template.
Add Menu Items
Using the first drop-down menu, you can edit the menu/pages items on your website. You can create new menus/pages and manage existing ones:

In the next drop-down section near the gear symbol you can find the following options

Change Background
The Background menu has different options to modify your website’s background color or image. You can choose one option to be displayed on all pages, or have different backgrounds on different pages.

Styles
The Styles menu provides an option to modify existing headers and create custom ones. There are tabs for the Standard, Links and Advanced settings:

NOTE: All fonts and header designs were created by professional template designers and can be changed only using the Styles menu.
Working with Features
The next set of menu options provides a wide range of tools you can use to add website content and make changes to the template:

To use some of the options you need to click on it or ‘drag and drop’. Then, select the style of the chosen option. If you wish to use some another style, click on the pencil icon or double-click on the item to open the editing menu. More details on each option below.
Text
You can drag and drop the Text option or just click on it to add some text to the page and choose the style of the text.
Click the Pencil icon >> Edit text option or double-click on the text itself to change formatting and text style.
If you would like to change the font and size of the text, you will find that under the Styles drop-down menu >> Edit Styles:

Pictures
With the help of the Picture menu option, you can choose how the picture will look like and then Upload New Picture. Choose a picture from the Template or Free Gallery, paste a picture from the web using Picture URL, or use one of the Font Awesome Icon option. You can also create your own folders and upload pictures there:

Gallery
When using the Gallery menu, it is required to select the layout of the pictures that will be shown and then, choose multiple pictures. It is possible to display them as Thumbnails, a Masonry, a Slideshow or a List with the help of the Change type option

Media
The Media button allows you to embed a YouTube video, Vimeo video or use a Music Player. Choose then type of the player and click on Add.
Then, click the Pencil icon >> Properties or double-click on the video to specify a video URL or ID and configuring additional video settings (like display order, size, position, player controls, etc).
Maps
It is possible to add Google Maps, Yandex, Bing Maps. You can specify coordinates or a physical address to be shown on the map. Select Zoom level and drag marker to set your location.
If you would like to use Bing Maps, you will need to get an API Key from Bing.
Shape, Line and Button
In case you wish to add some basic graphics, you can use the Shape and Line menus and select the available options. Alternatively, create your own shape using the Pencil icon.
You can also create different buttons for the website using the Button feature and trying items created previously. If you wish to change the button text, URL, and format, double-click on it.
Go to the button’s options >> edit URL to connect the button to an outside URL, a separate page on your website, an email address, or a downloadable file from your website:

Add a Contact Form
The Form menu provides the templates of common contact forms. With the help of it. you can create a contact form with a built-in PHP mailer as well as SMTP authentication.
Here you can configure fields that will be shown in the contact form:

In Simple fields you can choose default fields or set your own. It’s also possible to mark lines as Required. The Options section creates questions with drop-down menus. You can also use the Checkboxes option to get the submitter’s consent for a specific condition.
The E-mail settings section contains various configurable fields to ensure the contact form sends the email correctly:

Specifically:
1. Form will be sent to this E-mail – You must specify the email address that will receive emails from the contact form. It is possible to enter several emails separated by semicolons.
2. Form will be sent from this Email – You need to use the email address listed for your account in the cPanel or a third-party email address. If you want to use a third-party email address in the From field (like Gmail, Private Email) or avoid ‘via cPanel user@server’ part, SMTP authentication is required. You need to tick SMTP Enable and enter SMTP details:
SMTP Host: hostname of the SMTP server or localhost
SMTP Port: 465 for SSL encryption and 587 for TLS option.
SMTP Username: full email address – this should be the same address listed under ‘Form will be send from this Email’
SMTP Password: password from this email account
You can find the example of SMTP setup below:

3. The maximum size of attachments the users will be able to send through the form can be set to a specific number (like 2MB) or changed according to maximum allowed size for uploads for your account or maximum size your email server will accept in a message (whichever is smaller).
4. The Form menu also allows enabling Google reCAPTCHA in the Settings tab. CAPTCHAs allow you to prevent many forms of automated spam.
Add a Languages
If the website is targeted to a multilingual audience, the Languages menu will be helpful. It creates menus that allow switching between languages and allows you to create several versions of the website in the same interface.
To enable it, you will need to add two or more languages and choose Language switcher. If you set the switcher to Flags, additional Flag settings will appear:

After you configure the feature and add it to your website, you can switch between the languages and start creating the multilingual website:

NOTE: You will need to translate the website content manually – the Languages option doesn’t actually perform translation on the text.
Blocks and Social
The Blocks section has already configured mockups for pages that can be used as the Contacts, About us, Media, Products, and Teams sections:

The Social tab can help you to add links to your Instagram, Facebook, Flickr, Pinterest,and Twitter social media accounts.

Advanced settings
The Advanced section has extended features:

In this section you can do any of the following to your website:
- add Google Calendar using its ID. Be sure the calendar is set to be publicly viewable or it will not appear. (NOTE: It won’t be possible to change or add events to the calendar via the website);
- manage HTML Tables;
- configure a Skype call or chat with a particular user;
- try Effect – a paid tool for online chat;
- generate an ad in your Google AdSense account and copy & paste its HTML code into AdSense;
- add advertising/flash Banners;
- insert your own HTML code to the website.

Are you Dedicated, Hardworking, and Fun? Join Us!
Lorem ipsum dolor sit amet, consectetur adipisicing elit, sed do eiusmod tempor incididunt ut labore et dolore magna aliqua. Ut enim ad minim veniam, quis nostrud exercitation ullamco laboris nisi ut aliquip. ex ea commodo consequat.
Are you Dedicated, Hardworking, and Fun? Join Us!
Lorem ipsum dolor sit amet, consectetur adipisicing elit, sed do eiusmod tempor incididunt ut labore et dolore magna aliqua. Ut enim ad minim veniam, quis nostrud exercitation ullamco laboris nisi ut aliquip. ex ea commodo consequat.
Turn Your Prospects Into Buyers
Sed ut perspiciatis unde omnis iste natus error sit voluptatem accusantium doloremque laudantium.